- 1. 1. Decoupage and other DIY furniture refurbishing ideas
- 2. 2. Beautiful DIY home items: rugs
- 3. 3. Unique DIY “marble” crafts (photos)
- 4. 4. Woven Crafts for Interiors: Handmade Pillows
- 5. 5. A DIY Bed Headboard
- 6. 6. DIY Ideas for Home: Roman Shades
- 7. 7. Turn Photos into Wall Decor
- 8. 8. Creative DIY Lampshades
- 9. 9. Succulents – Live Home Decor DIY
- 10. 10. DIY Home Decor Made From Glass Containers
Someone will undoubtedly look at this collection of ideas and say that it’s easier to buy new furniture or decor. But this article is for true aficionados of unique style and handmade items only. Here, you’ll find 10 of the most beautiful interior items you can craft at home without spending extra money.
The best DIY crafts from handy materials for 2023!
1. Decoupage and other DIY furniture refurbishing ideas
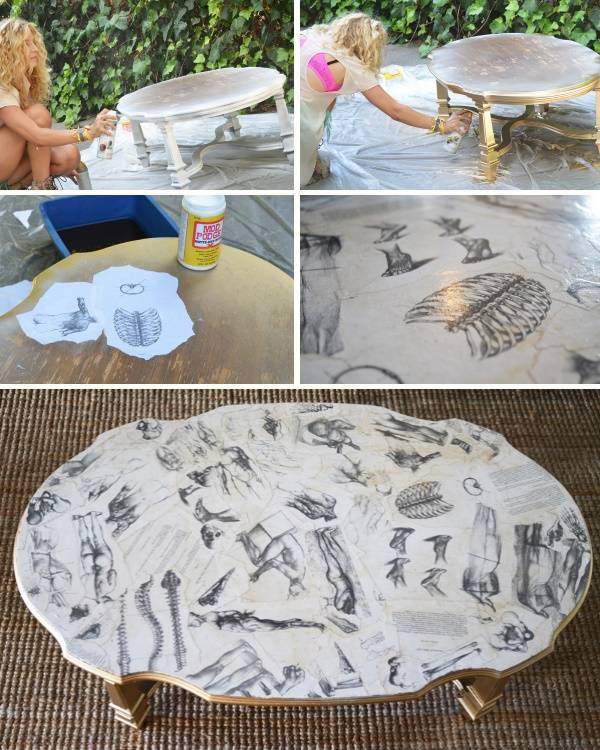
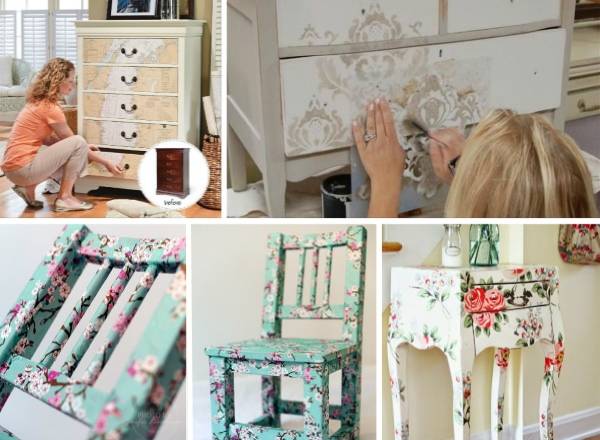
Restoring old dressers and buffets is arguably one of the main trends of our time. Many furniture items wear out over time: tables and chairs become wobbly, upholstered furniture gets compressed and needs new “filling”. But dressers and buffets can last for many years while becoming outdated in appearance.
DIY enthusiasts and decoupage artists have not only found ways to revamp the design of old furniture but have also set a trend for incorporating vintage “grandma’s” dressers into modern decor. You can find detailed instructions on painting and decoupage in our article titled DIY Soviet Furniture Restoration Ideas.
Below are a few photos of stunning home projects to inspire you.
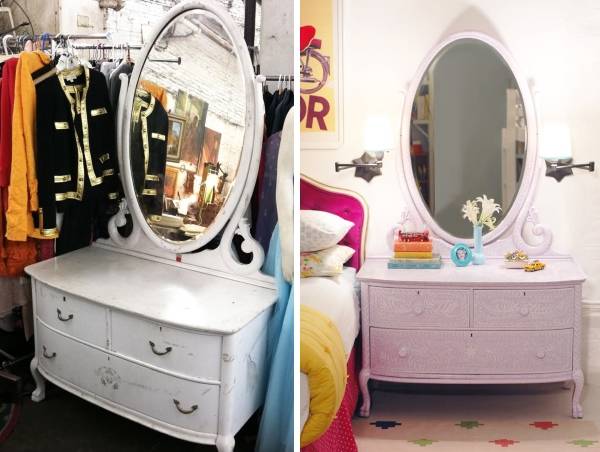
Restoration of an old dresser with handle replacement and hand-painted designs:
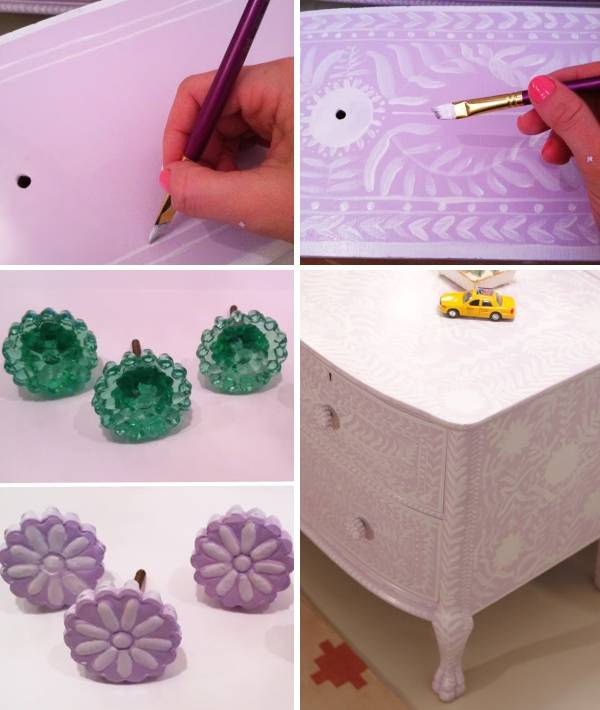
Painting and finishing of an old nightstand with metal knobs:
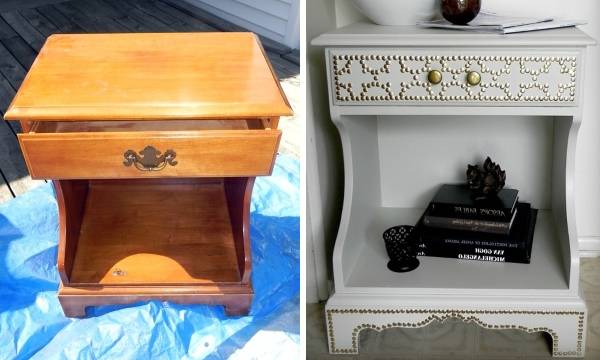
As a result, the furniture acquired a unique Moroccan-style decor effect. Simple, yet brilliant:
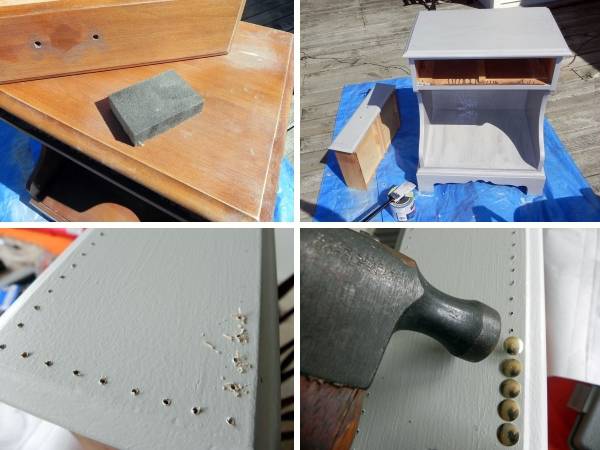
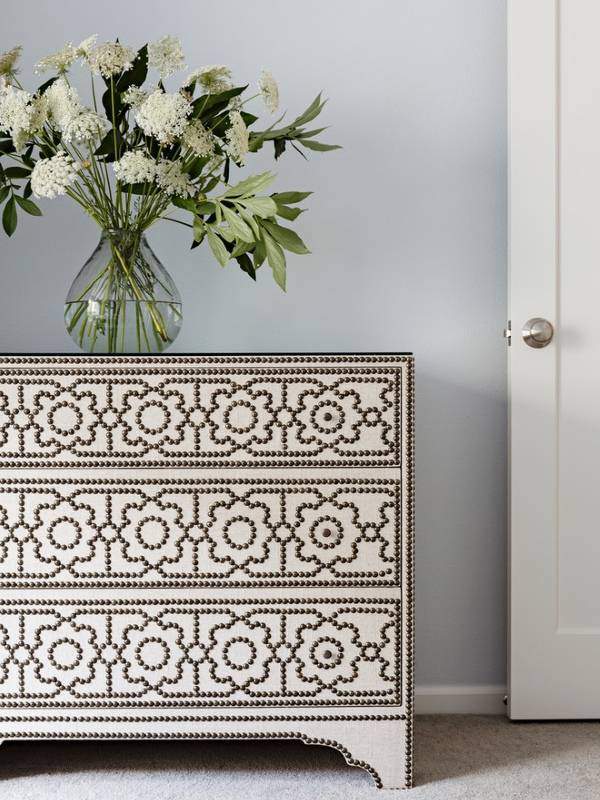
By the way, you can use this method to create even more sophisticated home items:
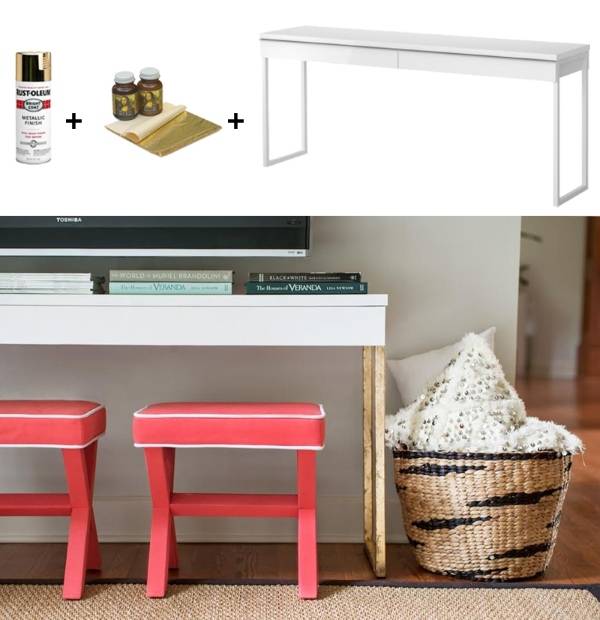
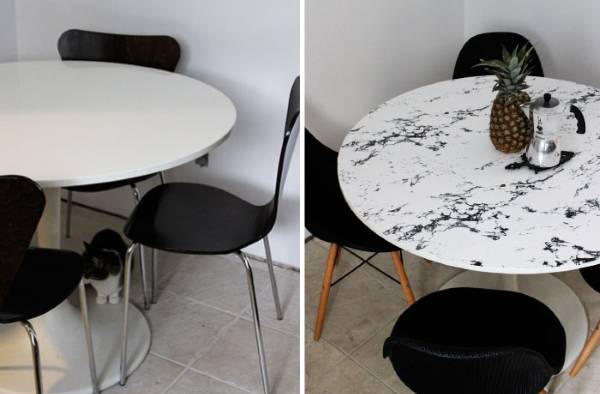
Decoupage and painting remarkably transform old furniture facades, but not everyone has the time or patience for this meticulous work. Hence, the best DIY ideas will also involve furniture revamp using adhesive tape mimicking marble, gold, and other unusual finishes. Minimal effort and even the most mundane piece of furniture becomes the centerpiece of your decor.
2. Beautiful DIY home items: rugs
Perhaps the most delightful part of crafting for your home is when a guest asks: where did you get such a beauty? A stylish zebra-printed rug (or another design of your choice) will undoubtedly earn such a compliment. And not just once.
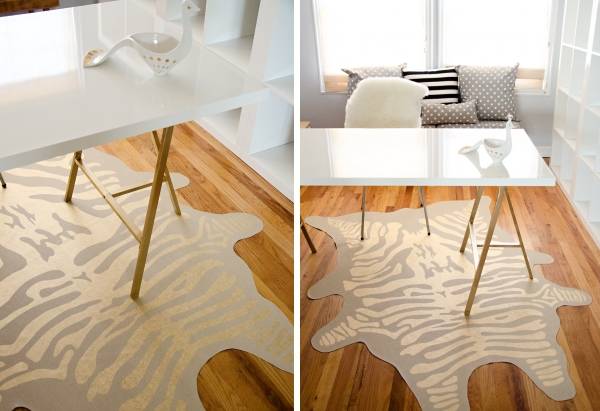
You’ll be surprised at how easy you can DIY this.
Any fabric will do. Just make sure it’s not too demanding in terms of care: it shouldn’t fear moisture and should be easy to clean. In this case, the craftsman chose vinyl fabric. It’s heavy and durable enough to resemble a real carpet. Moreover, the quality of vinyl these days is quite impressive and it’s available in a wide range of colors and interesting textures.
All the necessary materials and tools:
- Thick paper;
- Vinyl upholstery fabric;
- Scissors;
- 2 Krylon markers or regular fabric paint.
Steps:
- Create a stencil out of paper. Draw and cut out the contour of a zebra’s hide, then the pattern on it. Don’t worry about your drawing skills – a zebra’s skin doesn’t need to be uniform or symmetrical. If needed, you can copy the pattern from an online image or even print it out to cut.
- Secure the stencil on the vinyl fabric and trace the stripes with Krylon markers (apply the paint with spray or a brush). After this, remove the stencil and continue coloring inside the outlines.
- Let the paint dry, and you’re done! For added assurance that the pattern will last, you can “seal” the carpet by spraying it with a clear acrylic aerosol paint coat.
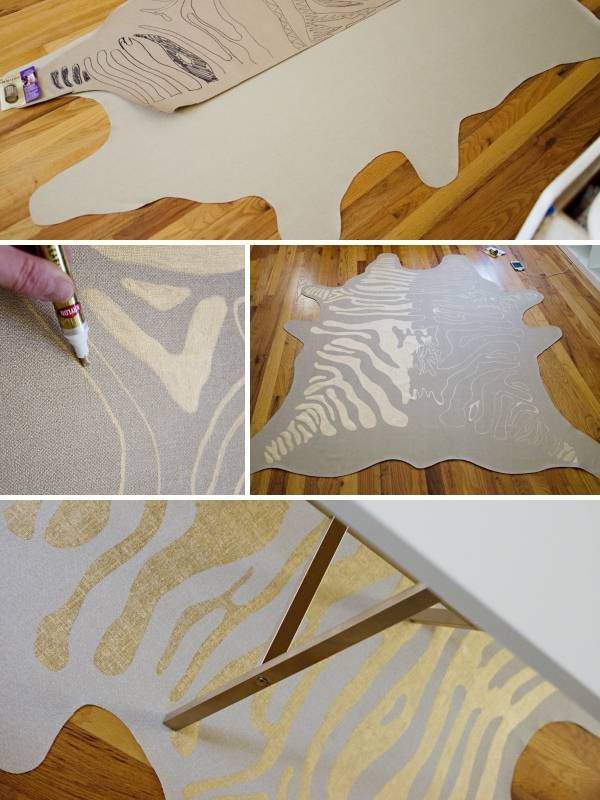
Krylon markers create a stunning gold leaf effect on the fabric. Besides, the paint in them dries quickly and holds very well. If you can’t find them in your city, just use regular fabric or wall paint. Like the next hero of our article.
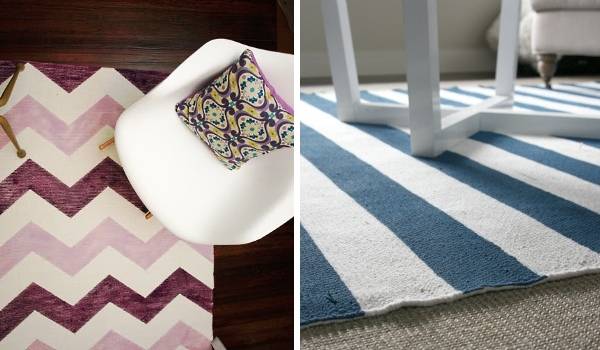
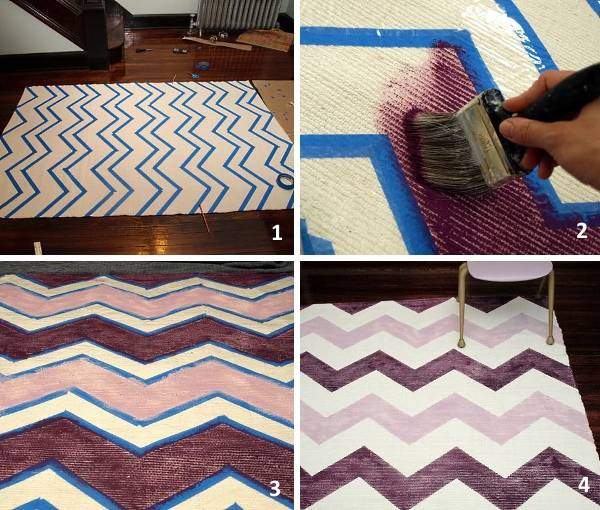
He took a cheap white rug as a base and decided to give it a unique look using a chevron pattern. All he needed was thin tape, scissors, a thick brush, and latex paint in two different shades.
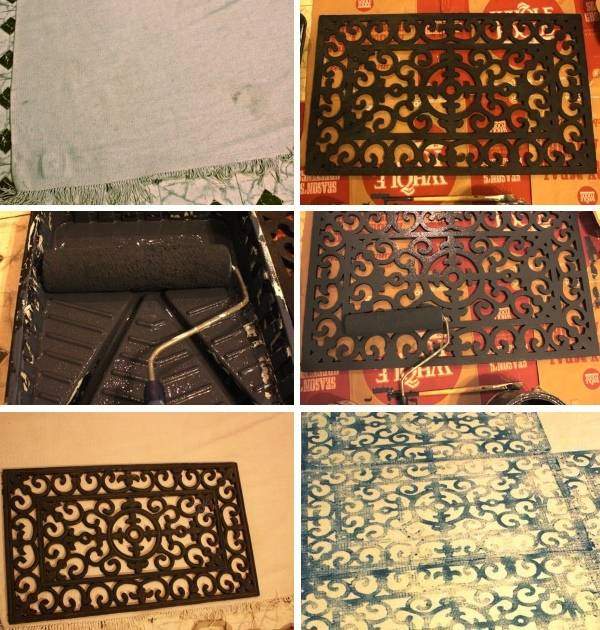
Finally, another inspiring example where instead of a stencil, an improvised stamp is used. The craftsman had a rubber bathroom mat, leftover wall paint (diluted with water for a vintage effect), a roller, and an old wool IKEA rug. Check out the pictures to see what he managed to create with these ingredients.

3. Unique DIY “marble” crafts (photos)
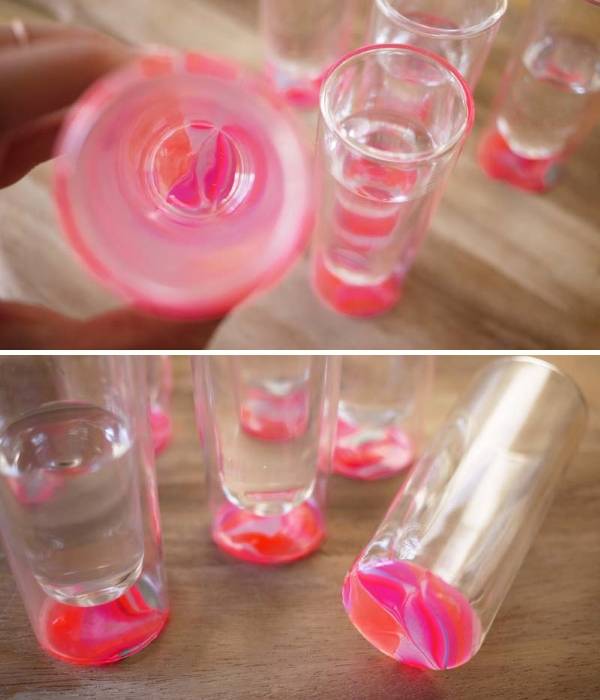
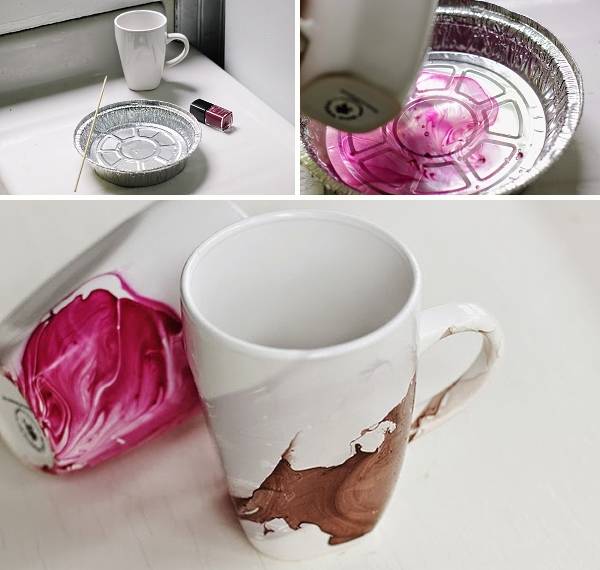
In our article “Modern Interior Items: Trends of 2023”, you might have learned that the marble effect is extremely fashionable. But who would’ve thought you can achieve it with regular nail polishes? And not just for manicures, but also for making beautiful home decor DIYs.
**What you’ll need:**
- Item to paint (any dish, flower pots, and other hard, low-absorbency items);
- At least 2 nail polishes of any shade of your choice;
- Clear nail polish or smart enamel;
- A disposable plastic or other container;
- Nail polish remover;
- Thin adhesive tape;
- Toothpicks.
**Steps to follow:**
- Use adhesive tape to mark off the area you’ll be painting.
- Fill the disposable container with water. Open all nail polish bottles, except the clear one, and start dripping the polish from the brush into the water, one color at a time. Each subsequent color layer should be applied over the previous one.
- Grab a toothpick and draw several lines from the center to the edge (see photo instruction below). Act quickly, as the polish will start to harden very soon.
- Dip the bottom part of the dish (bounded by the tape) into the pattern you’ve created on the water. Let it gather around all sides of the item, then carefully pull it out and leave it to dry.
- Before painting the next item, remove the remaining polish from the water with a toothpick and repeat the previous steps.
- Once your new decor has fully dried, secure the marble pattern with a layer of clear polish. Once this layer has dried, remove the adhesive tape and clean up any accidental polish spots with the remover.
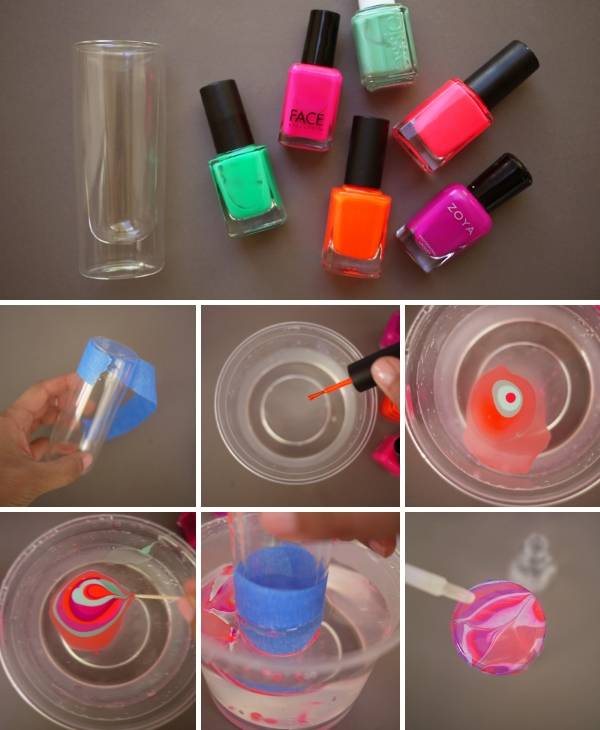
Here are a few more photos with examples of creating such decor for interiors.
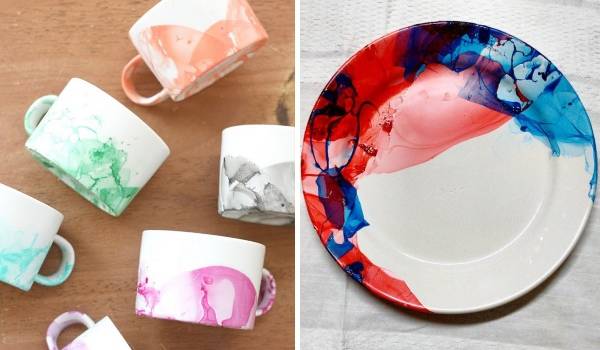
The next 3 positions in our article are dedicated to fabric crafts for home.
4. Woven Crafts for Interiors: Handmade Pillows
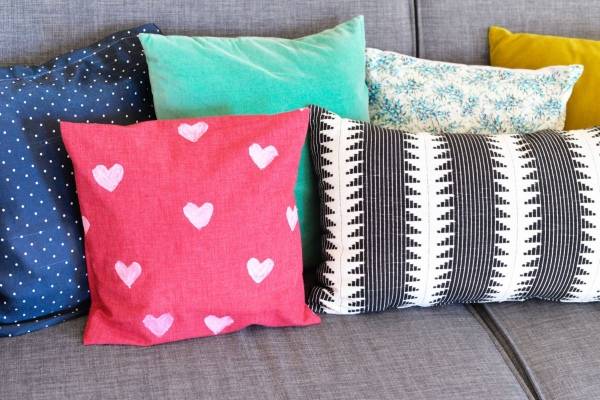
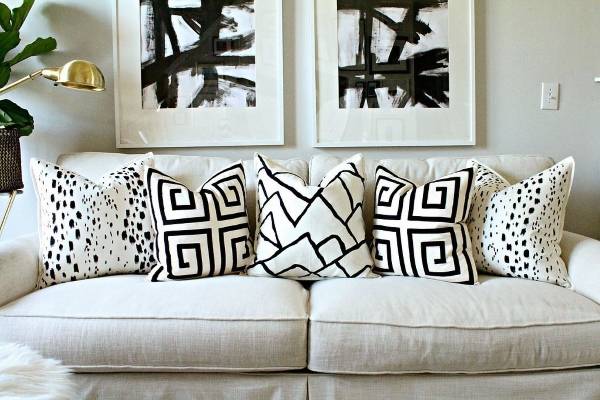
Bright sofa pillows and poufs are an easy way to change the mood in the interior and refresh the living room design. If you have a sewing machine, it won’t be difficult for you to craft such interesting decor for your home. Here’s a photo example:
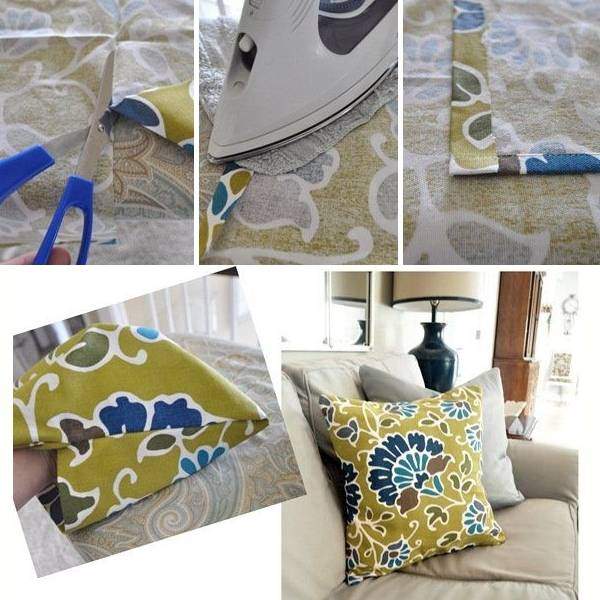
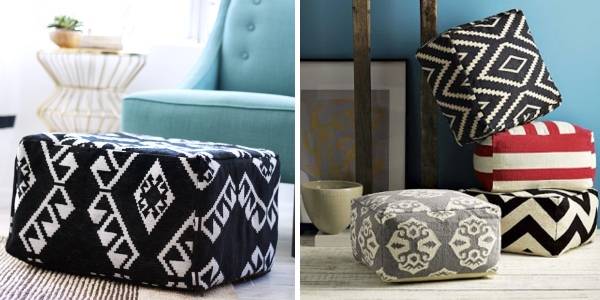
If you don’t want to buy new fabric or don’t have a sewing machine, you can still update old pillows by painting them a new color or creating patterns with a stencil (following the same principle as with carpets – see the instructions above).
Let us give you an example of a very interesting fabric painting method where, as a result, it acquires a trendy ombre effect.
In this case, the artisan used RIT fabric dyes, but you can use any others. For the pillowcases to absorb dye easier and faster, it’s recommended to thoroughly wet them with water. To achieve the “Ombre” effect, dip the pillowcase about 2/3 (roughly 66.7%) of its length into the container with diluted dye. After that, immediately pull it out another 5 cm (about 2 inches). Leave it like that for about 5 minutes, then pull out another 5 cm (about 2 inches). Continue this process until you’ve completely removed the pillowcase from the dye. The artisan’s result is in the photo on the left.
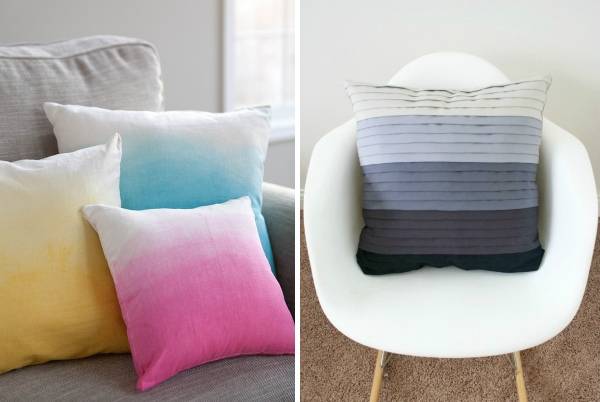
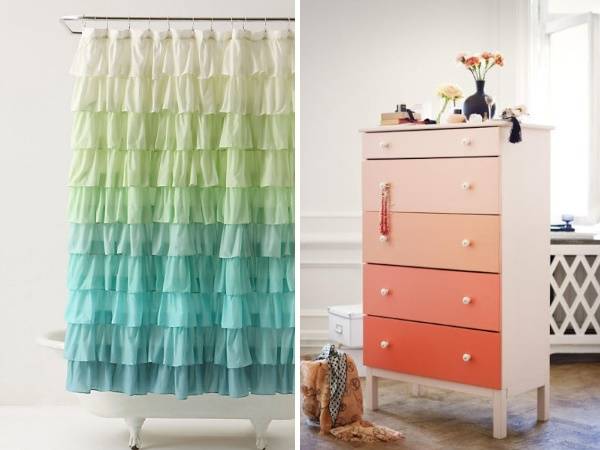
The photos on the right and below show more examples of stylish home items with an ombre effect.
5. A DIY Bed Headboard
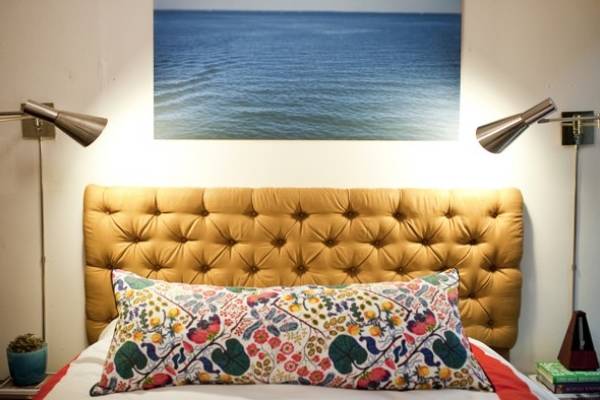
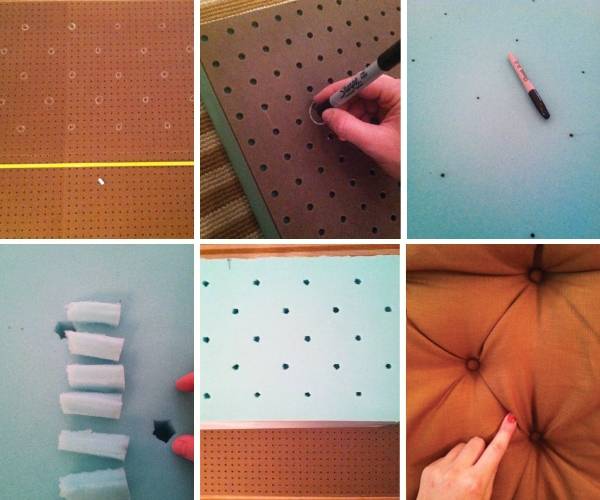
There are hundreds of creative ways to beautify a bedroom with a stunning headboard. You can learn about many of them in our article “65 DIY Headboard Decorating Ideas.” Here, we provide you with a helpful photo guide on creating a classy headboard. You’ll need a pegboard, a piece of foam, fabric, threads, and buttons!
6. DIY Ideas for Home: Roman Shades
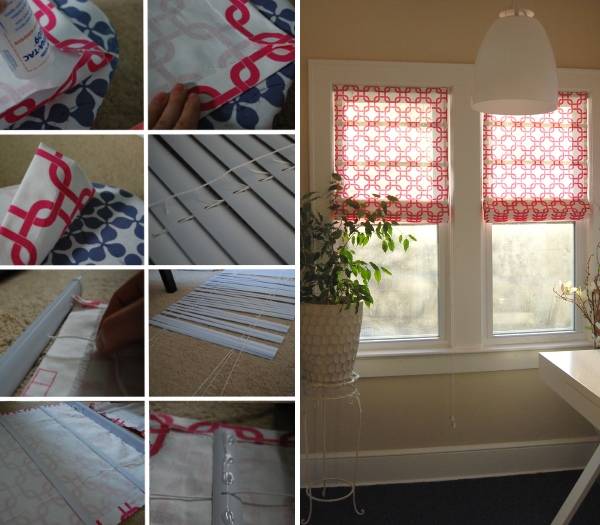
Beauty and functionality – 2 in 1! If you have old blinds, you can make them like the example in the photo below. Get more ideas and options on making such curtains by hand in our article “Roman Shades in Interior Design.”
7. Turn Photos into Wall Decor
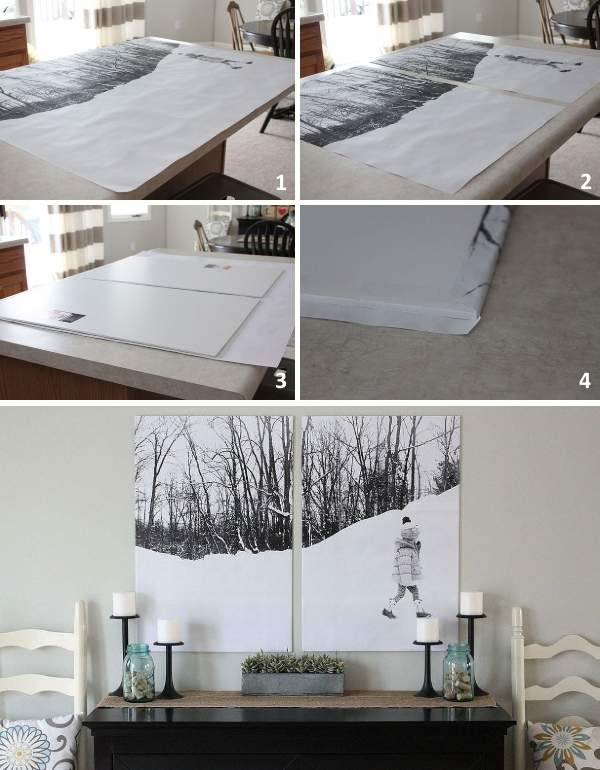
This is way cooler than just hanging photos in frames! Your personal photos or any images from the internet can become beautiful wall art for any room. To make this decor yourself, you can use any of the following methods.
Method 1:
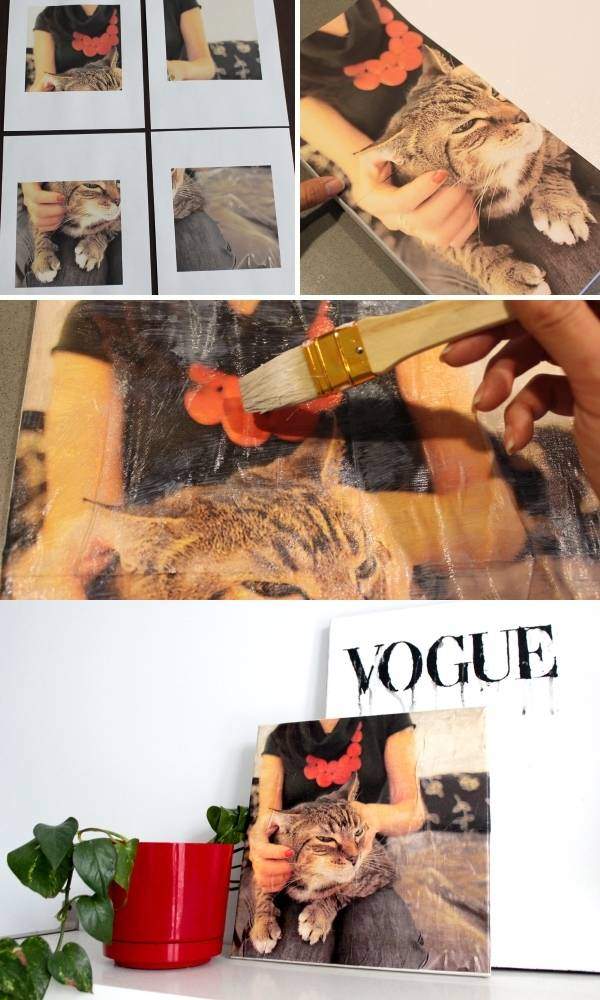
- Find or purchase a backing. It can be a thick sheet of foam or polystyrene (like in this case), a board, or other handy materials.
- Print the photo after editing its size so it’s about 5 cm (about 2 inches) larger than the backing. These “extra” centimeters (inches) will be for the folds.
- Cut the photo and the backing into pieces if you want a modular set instead of a whole picture. Otherwise, skip this step.
- Place the photo on the backing and wrap the ends. The creator of this item used double-sided tape to attach the photos. You can use regular glue or other available means. You can also coat the photo’s surface with glue or wallpaper paste for shine.
Method 2:
- Print the image and prepare a canvas to which it will be transferred.
- Stretch the canvas over a frame and apply a thick layer of gel medium. These gels are widely available and can be bought in any home improvement store.
- Place the photo on the coated canvas and press it down. Leave it for several hours, but occasionally spray with water using a sprayer.
- With the tips of your fingers, gently begin to rub off the back surface of the image from the canvas. Continue this until you’ve removed all the paper.
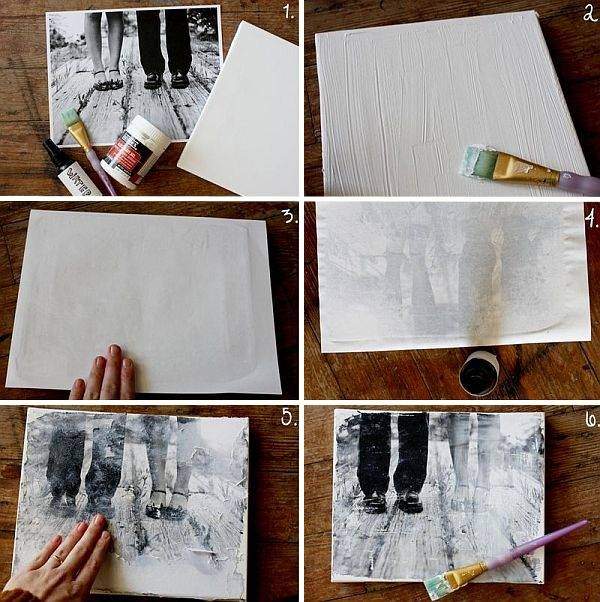
As a result, you’ll have a beautiful wall decor with a distressed look, adding a touch of vintage style. The final step is to apply another layer of gel medium as a protective coat.
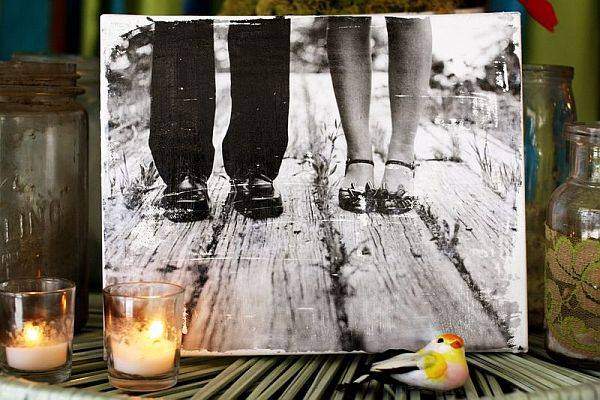
For some inspiration, here are a couple more ways to adorn your interior with photos.
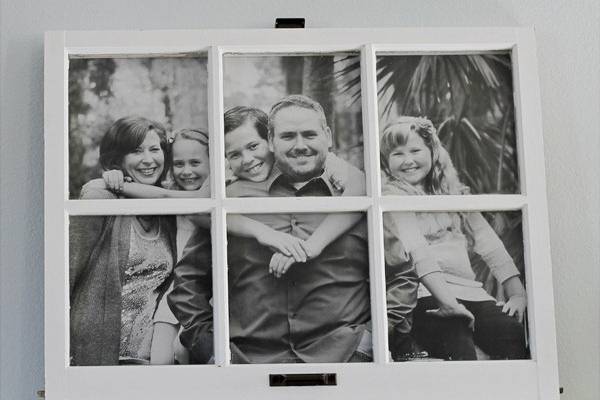
Use an old window frame as a photo frame.
What do you think of this idea?
8. Creative DIY Lampshades
DIY lampshades made of fabric, paper, thread, and other available materials will not just beautify your home but will also bring a unique ambiance during the darker hours.
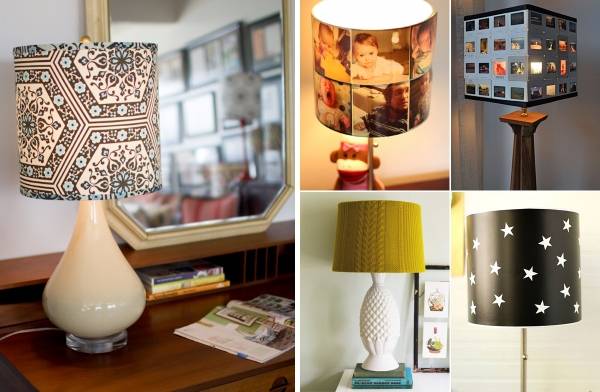
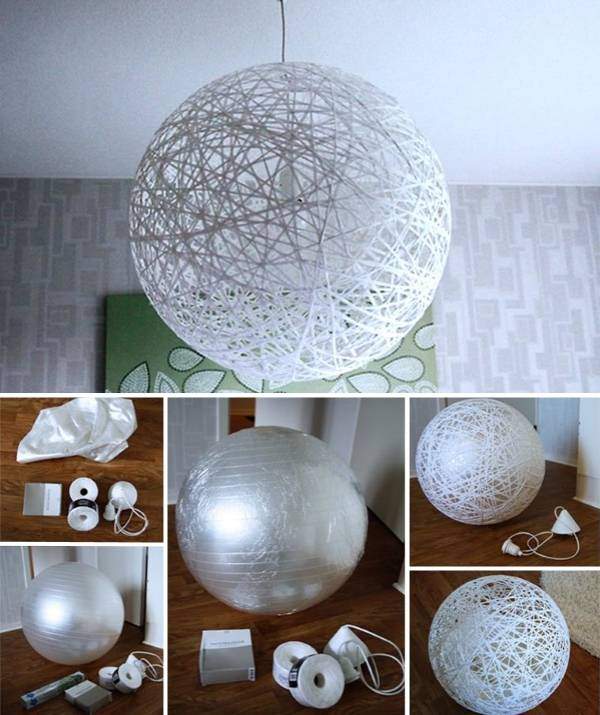
Find the best ideas to your taste in our article, “The Most Beautiful DIY Lampshades.” The next photo shows a popular creative lampshade made of threads.
9. Succulents – Live Home Decor DIY
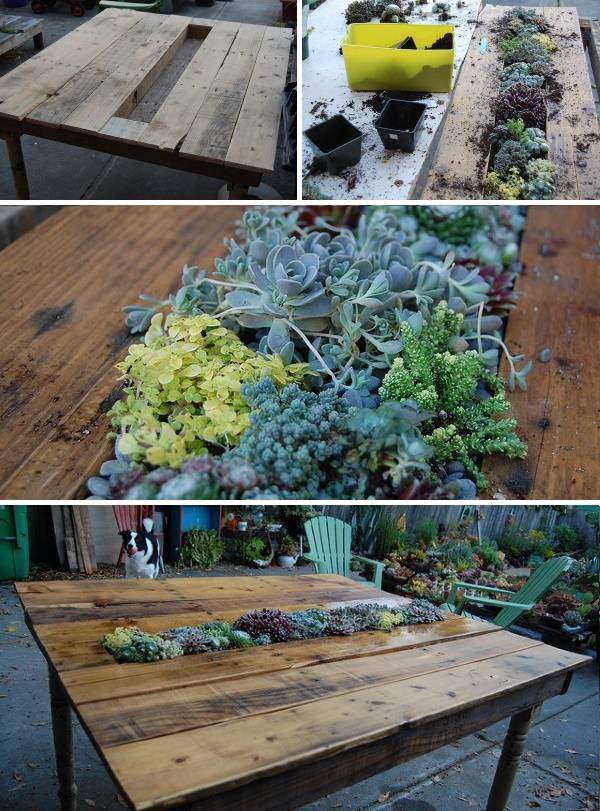
A living wall of succulents is perhaps the most amazing craft for the home that you can make yourself. Admit it: if you saw one in someone’s living room or any other room’s design, you wouldn’t remain indifferent!
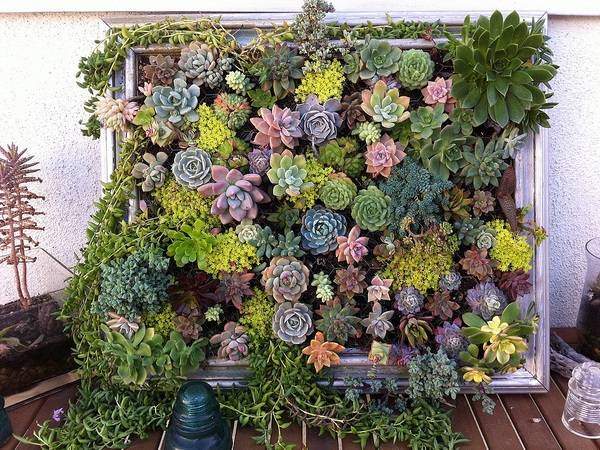
Lanaspace will guide you on how to create such a striking and eco-friendly decor:
- You’ll need a shallow wooden container for planting and a metal grid.
- To attach the grid to the container, use a makeshift wooden frame made from small boards or shavings. Secure with staples or nails.
- Prepare any succulents for the composition. They easily adapt to tough conditions and look most appealing when you combine different shades and leaf shapes. Common examples of succulents include aloe, various cacti, houseleek or hen and chicks (Sempervivum), stonecrop (Sedum), dunce’s cap (Orostachys), and others.
- Fill the container with soil and plant your chosen plants. Use any cactus mix for drainage.
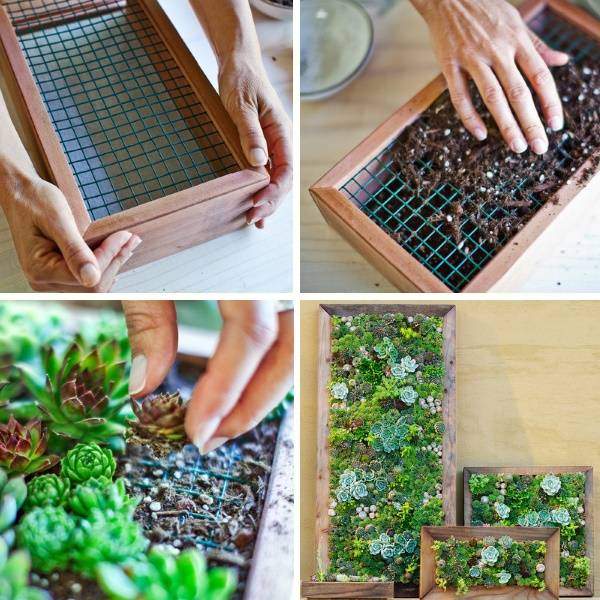
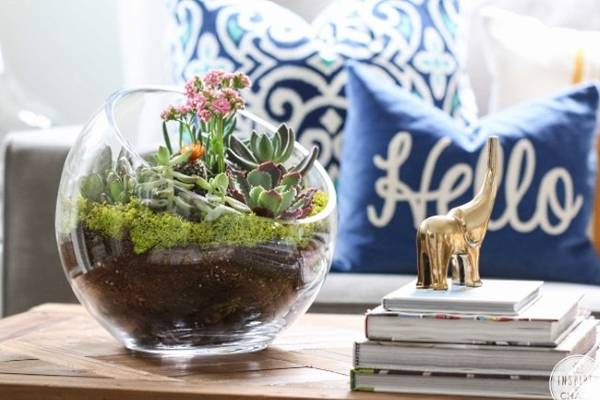
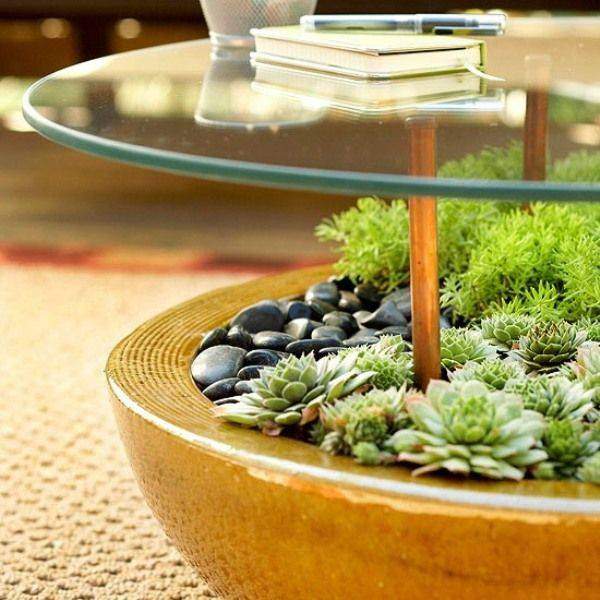
Here are examples of home crafts you can make using the method described above.
10. DIY Home Decor Made From Glass Containers
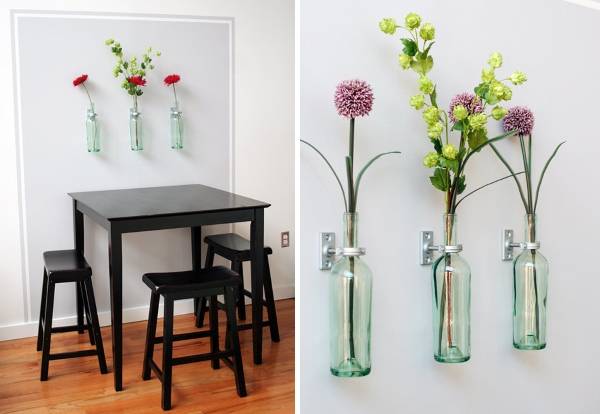
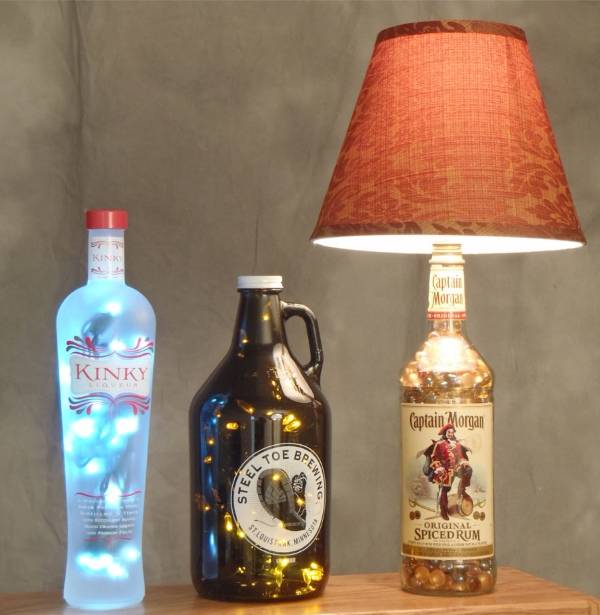
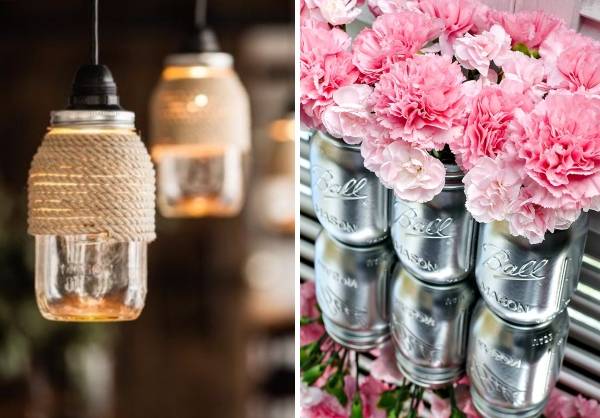
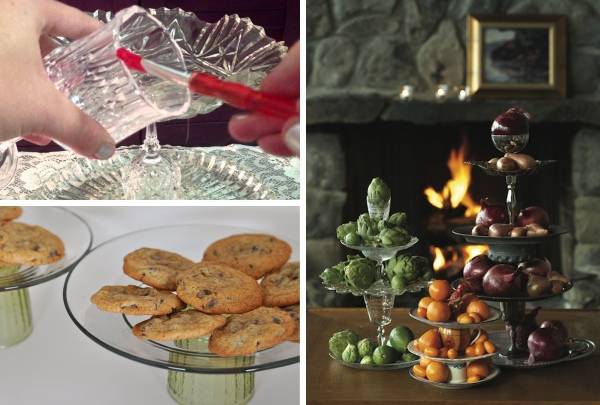
Glass bottles and jars often pile up on balconies and in storerooms. Nowadays, they’re transformed into so many things: lamps, candle holders, vases, table decor… It’s amazing how easily they become part of a stylish interior. All you need is a bit of ingenuity, along with paints, fabrics, threads, paper, and other available materials. Here’s the last set of photos for today. Also read: DIY Bottle Decor – 50 Ideas.

Leave feedback about this